Tutorial: Chart Settings
In ShareScope you can click on Help and access a series of tutorials that give you an overview of the way the program works. This training zone article is designed to complement these tutorials, but also offer more detail than they are able to.
In this tutorial:
Selecting different chart settings
In ShareScope you are presented with a chart that looks like this.
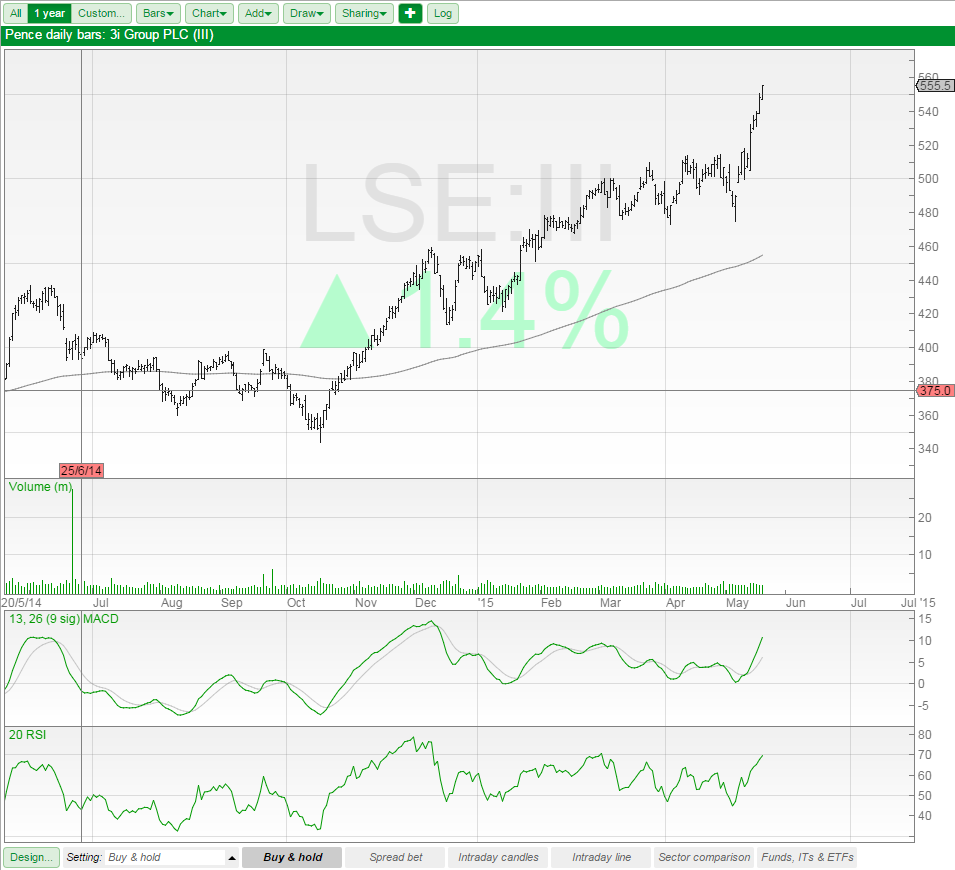
You can see, from the toolbar at the top of the chart, that the chart is set to show 1 year of data.
Just below this on the title of the chart you can see that the chart scale is set to Pence and the bar size is daily. You can also see that the current selected share is 3i Group.

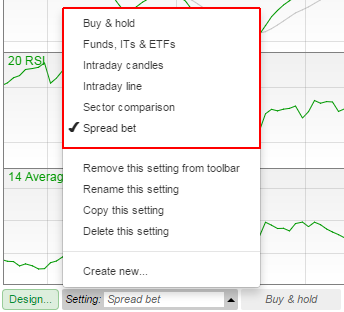
You can also see on the toolbar at the bottom of the chart, by looking at the Setting bar, that the current select setting is called Buy & hold. You can also see there is a button for this setting on the toolbar which is coloured grey as it is the current selected setting.

A setting is like a template and it determines how the chart looks and behaves. If you select the Spread bet setting by clicking on its button then the chart will change.
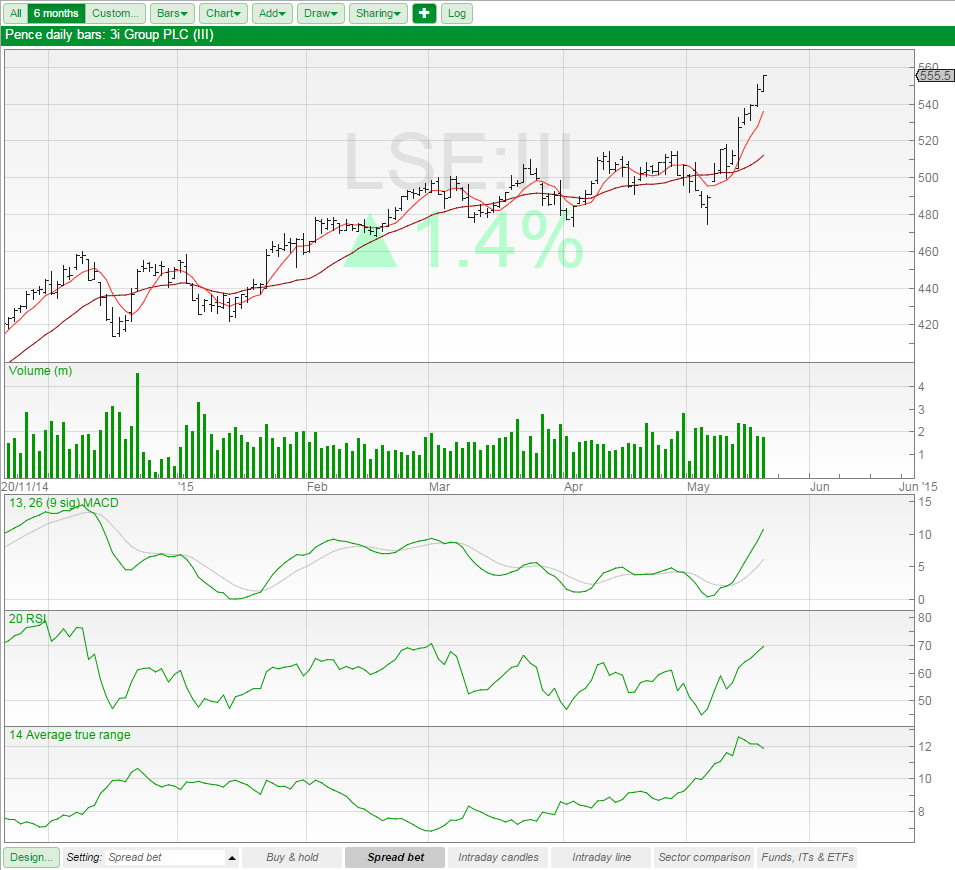
You can see that the Spread bet setting is set to only show 6 months of data. It also has different moving averages and while both settings have MACD and RSI indicators the Spread Bet setting also has an ATR indicator added to it.
You can also select one of the available settings by click on the Setting menu button on the bottom toolbar.
Creating a new setting
If you want to create a chart that shows the data in a different way to the default settings then you will need to create a new setting first.
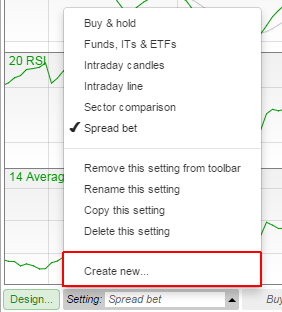
To do so click on the Setting menu button and select the Create new option from the bottom of the menu.
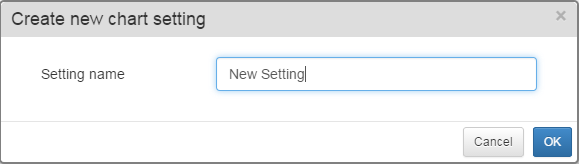
You will be given the opportunity to name your new setting and you can then click on OK.

The new graph setting defaults to showing a 1 year chart with daily Open, High, Low, Close (OHLC) bars.
Deleting, Renaming and Copying a setting
You will also find the options to Delete, Rename and Copy a Setting in the Setting menu.
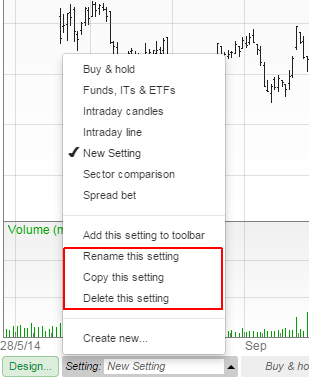
Copying a setting can be useful if you want a new setting that only requires small changes to be made to an existing setting, changing the bar size for example.
Deleting and renaming a setting are self explanatory. Deleting a setting is currently a permanent action so care should be taken to ensure you have the correct setting selected before you select that option in the menu.
Adding and removing a setting to and from the toolbar
To the right of the Setting menu button are buttons for the default settings if you select one of these and then select the Setting menu you'll see the option Remove this setting from toolbar.
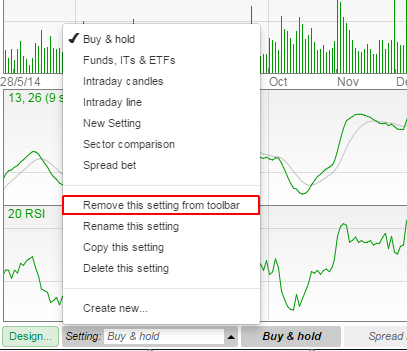
Select this and the setting button will be removed from the toolbar.
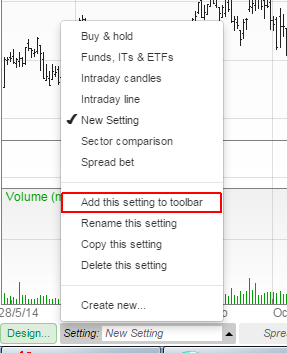
If you select a setting that does not have a button on the toolbar, then select the Setting menu you'll see the option Add this setting to toolbar.
Note: How many toolbar buttons are shown on the toolbar is directly proportional to the amount of space available to the graph. However, even if you cannot currently see them the buttons are still there.